

Push Notifications and Text Messages appear as tabs alongside Email and are marked Coming soon. Email is the channel available today.
Send an email
1
Go to Communication
Click
Communication in the left sidebar. The Email tab is selected by default.You can also jump straight there from an event card using its Communication Center button, which preselects that event.2
Choose the event
Pick the event from the
Event selector at the top.3
Select your recipients
Choose
Current event to target by ticket category, Past event to reach a previous audience, or Upload CSV for your own list. See Recipients and variables.4
Write the subject
Subject is required — a clear headline that tells attendees what this email is about. You can insert {{name}} and {{eventName}} here using the variable chips above the field.5
Write the body
The
Email Body is for the full message — event details, updates, reminders, or announcements. The same variable chips are available.6
Add a call to action if you want one
The
Call To Action toggle is Off by default. Turned on, it adds a button at the bottom of the email.7
Check your signature
The
Organizer Signature block is built from your organizer profile — your name, business name, and social links. Update it in Settings → Profile.8
Click Preview and Send
Read the preview properly before sending. An email to your whole attendee list cannot be recalled.
Who the email comes from
Below the body, TixFix states it plainly: the email is sent on behalf of your organizer via TixFix, and replies go to your organizer email address. Keep that address monitored around an event. People reply to ticket emails with questions, and they expect an answer. Set it in Settings → Profile.See what you’ve sent
The History panel on the right lists your recent sends with the subject, the event, the date, and how many were delivered — for example1 sent. Click View all → for the full history.
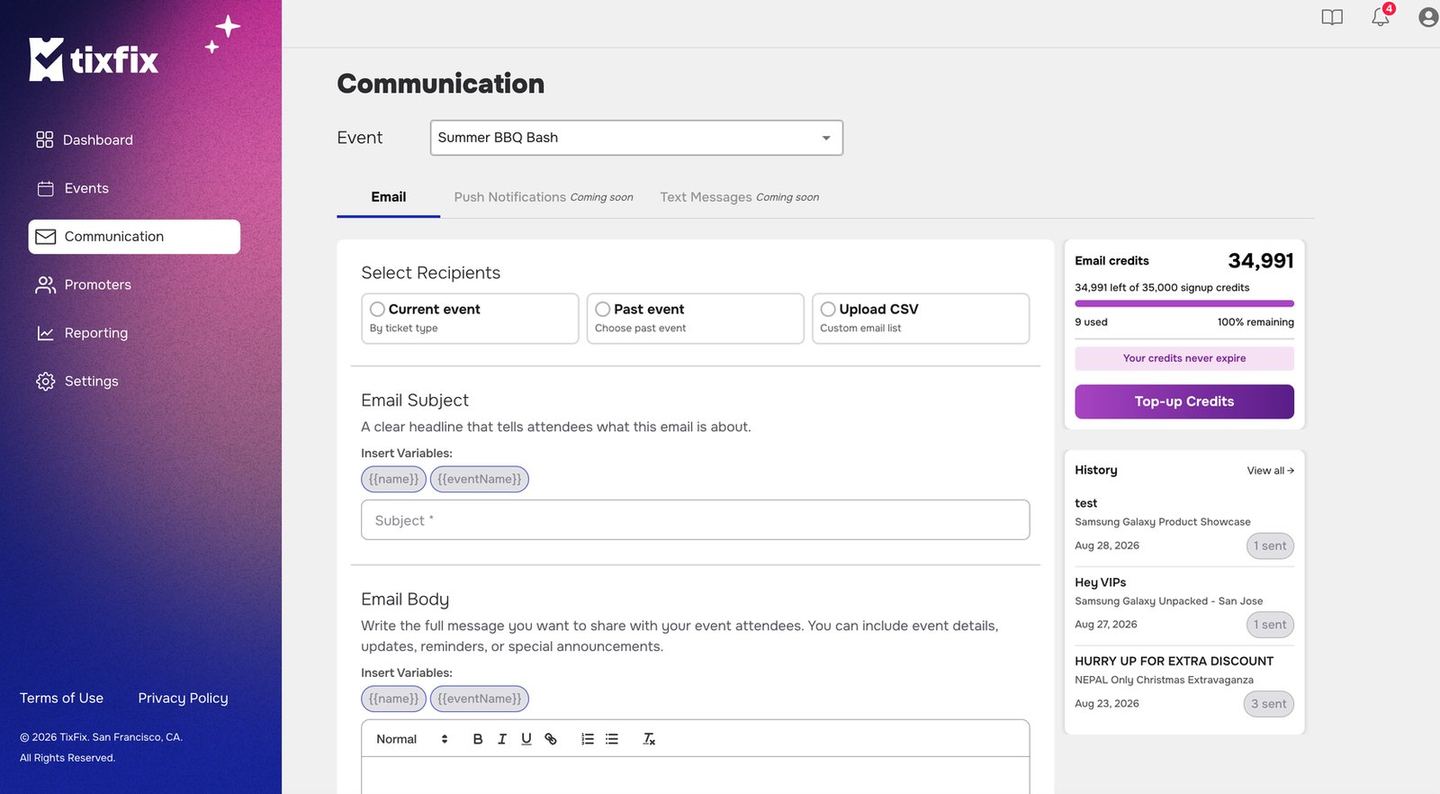
The Communication centre, with recipient selection, the composer, email credits and send history
View all → opens the full History page.
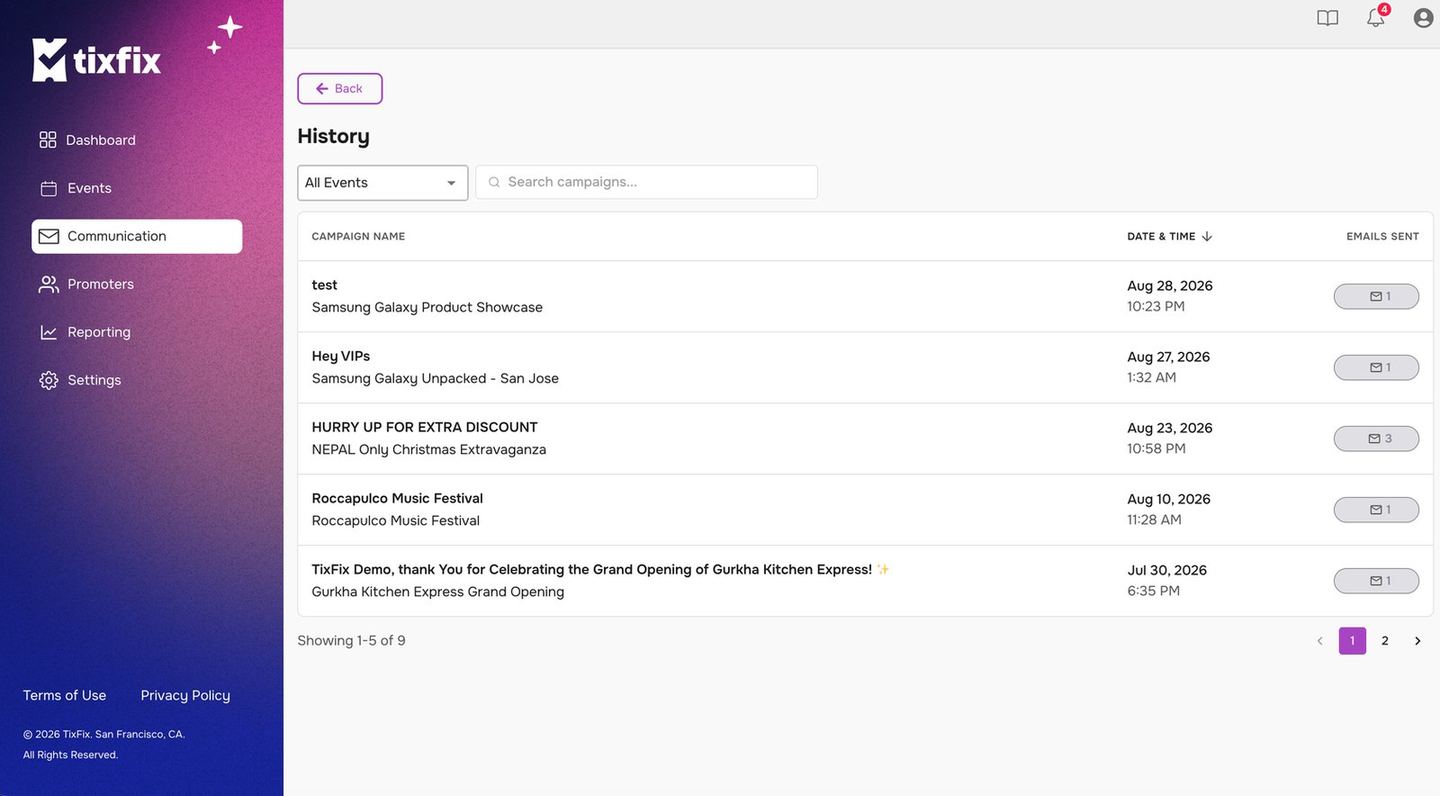
The History page, with an event filter, campaign search and per-campaign send counts
An All Events filter narrows to a single event, and
Search campaigns...
finds one by subject. Results are paginated.
This is the record to check before a send — both to avoid repeating yourself,
and to see what actually reached people last time.