

Choose your recipients
Three options sit at the top of the compose screen:Current event
The default, and the right choice for anything operational — reminders, schedule changes, door information. Because you can target by ticket type, you can send to one tier only. VIP arrival instructions go to VIP holders without confusing general admission. The habit to build: before writing a word, ask who this message actually concerns. Parking changes concern everyone; the artist meet-and-greet concerns one tier. Sending tier-specific detail to the whole list is the most common targeting mistake, and it’s doubly expensive — it costs credits for people who didn’t need the email, and it generates confused replies from general admission holders asking why they weren’t told about the meet-and-greet.Past event
The tool for filling your next show. Everyone who came to the last one is your warmest audience — announce the new date to them before you announce it publicly. This is also where your event history compounds. Each event you run builds an audience the next one can start from, without exporting or importing anything. Check your sales reports to see which past events drew the crowd most like the one you want next, and pick that audience.Upload CSV
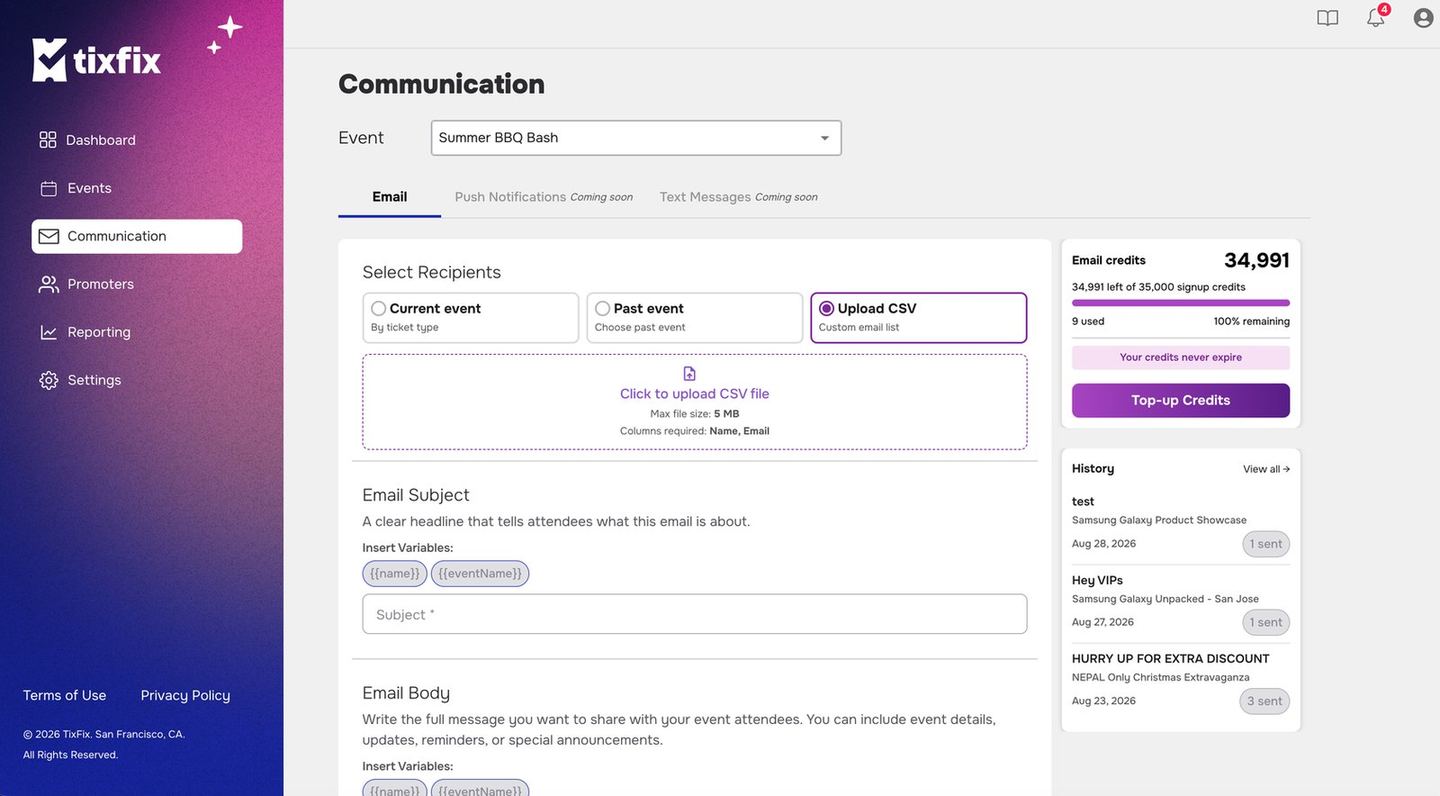
Upload CSV selected, showing the file limit and the columns required
Upload CSV opens a drop area with the requirements stated on it:
The
Name column is what fills the {{name}} variable, so a row missing it
sends an email with a blank where the greeting should be. Check that column is
populated for every row before uploading, not merely present as a header.
For a list that doesn’t exist in TixFix — a mailing list, a partner’s audience, a corporate roster.
Prepare the file before uploading: one recipient per row, remove duplicates, and check for obviously dead addresses. A partner’s list in particular is worth deduplicating against what you know of your own audience, or some people get the same announcement twice.
Personalize with variables
Two merge variables are available in both the subject and the body, as clickable chips above each field:
Click the chip to insert the variable at your cursor rather than typing it, which avoids typos — a misspelled variable sends literally, and every recipient sees the raw text instead of their name.
A subject line like this:
arrives as:{{name}}, your tickets for{{eventName}}are ready
Priya, your tickets for Summer Rooftop Social are readyPersonalization earns its keep mostly in the subject line, where it lifts the odds of the email being opened at all. In the body, use it where a name naturally belongs — the greeting — and stop there. A message that repeats the recipient’s name three times reads like a script, not a note. One caution:
{{name}} renders whatever the recipient typed at checkout. For a CSV upload, it renders what’s in your file — so if your list has names in ALL CAPS or “Last, First” format, clean that up before sending, or the greeting will faithfully reproduce the mess.