

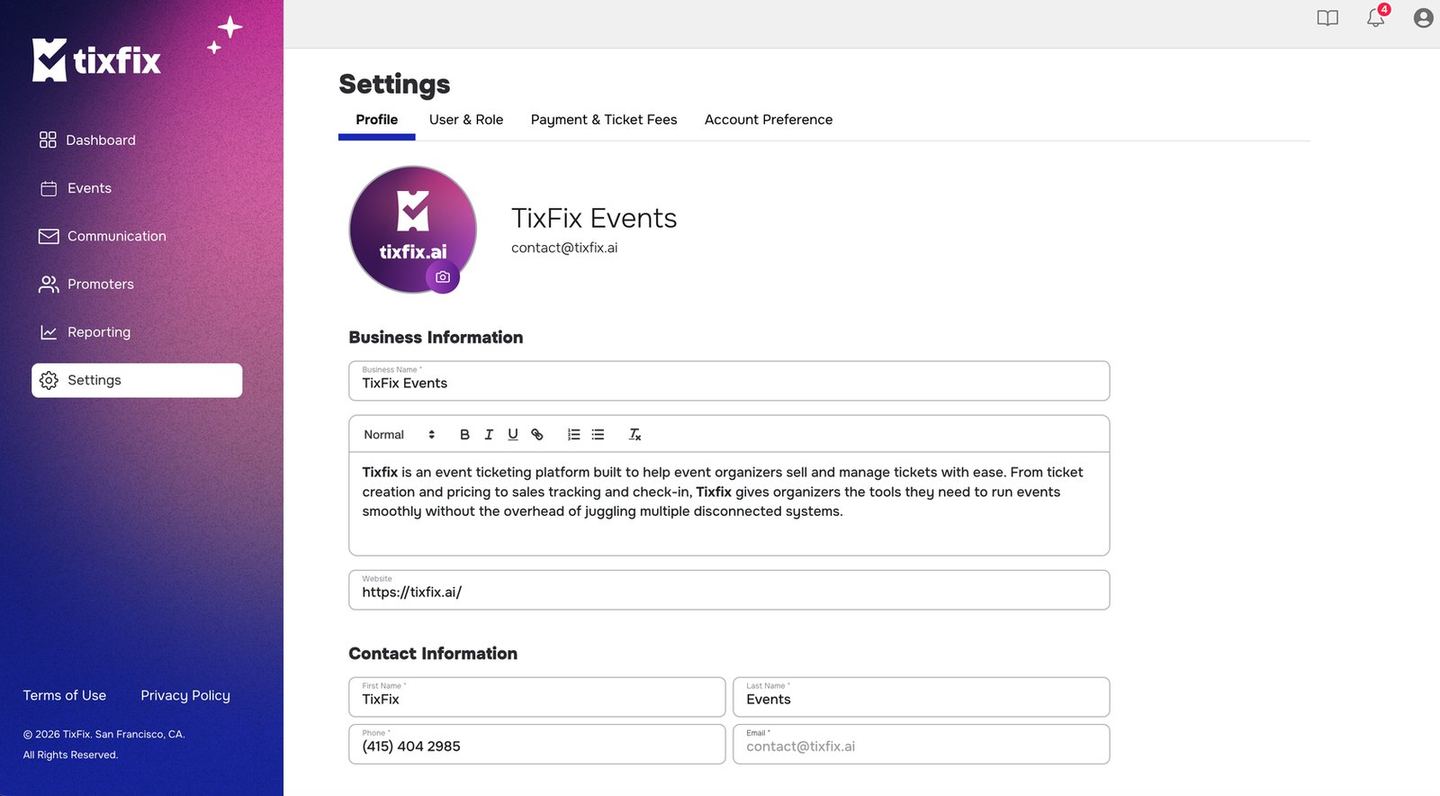
Settings → Profile, with the business name, description, website and contact details that appear on your event pages
Business information
1
Go to Settings → Profile
Click
Settings in the left sidebar. The Profile tab is selected by default.2
Upload your logo
Click the camera icon on the avatar at the top of the page to upload or change your organizer image.
3
Enter your business name
Business Name is required. This is the name attendees see as the event host.4
Write your business description
Use the rich text editor to describe who you are. Bold, italics, links, and lists are available.
5
Add your website
Paste the full URL, including
https://.Contact information
1
Fill in your contact details
First Name, Last Name, Phone, and Email are all required.2
Check the email address carefully
This address is the reply-to for attendee emails sent from TixFix. When a guest replies to an event announcement, it lands here. See Recipients and variables.
3
Enter your address
Address, City, State, and Zip are required. Address 2 is optional.Social media links
Add any ofInstagram, Youtube, X, Facebook, Tiktok, and LinkedIn. These appear in the signature block of emails you send to attendees.
1
Paste each profile URL
Use the full URL for each network you want to show. Leave the rest blank.
2
Click Save
Your changes take effect immediately across your event pages and emails.