

Events list. Each event card has a ⋯ menu on the right with three options: Edit, View, and Cancel.
Find your event
TheEvents list has an Upcoming / Past toggle above it. Newly created events appear under Upcoming; once the end date passes they move to Past and are badged PAST.
Use the Search Events box at the top to filter by name.
Each card shows the cover image, title, city, date, start time with time zone, tags, a share icon, the Going attendee count, and a Communication Center button.
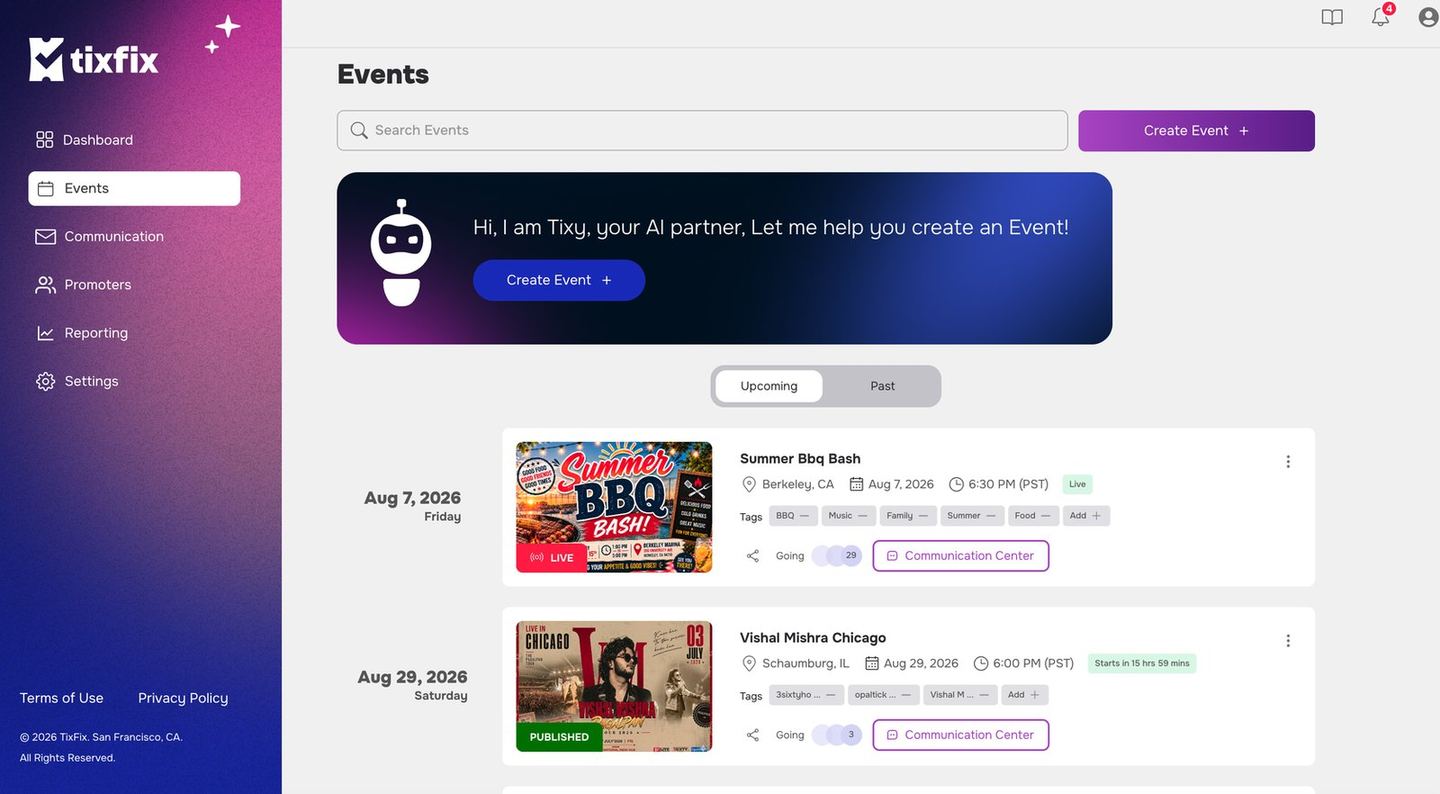
The Events list, with upcoming events, their tags, attendee counts and per-event actions
Edit an event
1
Open the event's ⋯ menu
Click the three-dot menu on the right of the event card.
2
Choose Edit
The event opens in the same two-step wizard you used to create it, pre-filled with your existing values.
3
Make your changes
Step 1 covers title, description, dates, cover image, category, tags, and venue. See Event details and venue.
4
Click Update and Continue
This saves step 1 and moves you to the tickets and registration step.
5
Adjust tickets or registration if needed
6
Save
Changes to a live event take effect immediately.
Preview an event
ChooseView from the ⋯ menu, or click View Event on the event’s detail panel, to open the public page exactly as an attendee sees it.
Do this after every significant edit — it’s the fastest way to catch a broken cover image or a description that reads badly on the live page.
Duplicate an event
To run the same event again on a new date, create a new event and copy across the details from the existing one — title, description, venue, ticket categories, and registration questions. Then set the new dates and publish.Cancel an event
1
Open the event's ⋯ menu
Click the three-dot menu on the event card, or open the event’s detail panel.
2
Choose Cancel Event
Confirm when prompted.
Still stuck? Email contact@tixfix.ai with your event name and a screenshot.